Gluten Free Ring Doughnuts with Nutmeg
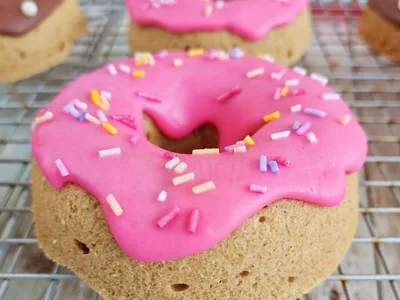
Tender, cake-style ring doughnuts made entirely gluten-free with warm nutmeg spice and a light crumb. The combination of baking powder and bicarbonate of soda creates a gentle rise and soft texture that rivals traditional recipes. Granulated and brown sugars add depth, while vanilla extract enhances the flavor complexity. These doughnuts are perfect for anyone managing celiac disease or gluten sensitivity who craves homemade baked goods. Serve warm for the best eating experience, ideally for breakfast, brunch, or afternoon tea. This version uses a simple creaming method without yeast fermentation, producing results in under 30 minutes from start to finish. The optional icing and cocoa powder glazes allow for creative decoration, making them suitable for casual family meals or special occasions. Unlike yeasted doughnuts requiring hours of rising, these bake straight into the oven.
Ingredients
- 3 ½ tbsp butter
- 3 ½ tbsp oil (vegetable or sunflower)
- ½ cups granulated sugar
- ⅓ cups brown sugar
- 2 eggsflax eggs (3tsp ground flax + 9tsp water per egg)3:1 by weightvegan
may slightly increase density
Full guide → - 3 ¼ cups gluten free all-purpose flour
- 14 tbsp milk
- 1 ½ tsp baking powder
- ½ tsp baking soda
- salt, pinch
- 1 tsp ground nutmeg
- 1 tsp vanilla extract
- ½ cups powdered sugar
- 3 tsp water, for icing
- food colour paste, optional(optional)
- sprinkles, optional(optional)
- 1 tsp cocoa powder, optional(optional)
- 4 tsp water, for cocoa glaze
Instructions
- 1
Preheat oven to 350°F and grease doughnut moulds with butter or oil spray
- 2
Beat together butter, oil and both sugars until lighter in colour and smooth
- 3
Add eggs, then stir in baking powder, baking soda, salt, nutmeg and vanilla
- 4
Whisk in flour then gradually add milk until you reach a soft dropping consistency
- 5
Spoon batter into moulds just below the middle bump level
- 6
Bake in the middle of the oven until doughnuts bounce gently when pressed with a finger
- 7
Cool briefly then decorate with icing glaze and optional food colour, sprinkles or cocoa powder as desired
Tips
Egg size affects milk absorption significantly. Add milk gradually and stop when batter reaches soft dropping consistency rather than using the full 200ml automatically.
For smaller doughnut moulds, reduce baking time to 10 minutes. Check for gentle bounce when pressed rather than relying on time alone, as oven variations affect results.
Underbaking slightly keeps doughnuts tender; overbaking dries them out. Remove when the crumb still feels soft to finger pressure but holds its shape.
Good to Know
Store in airtight container at room temperature up to 2 days. Glazed doughnuts keep slightly shorter due to moisture content.
Prepare unglazed doughnuts up to 1 day ahead, wrap tightly, then glaze before serving. Do not freeze.
Serve warm or at room temperature within hours of baking for best texture. Pair with tea, coffee, or fresh milk.
Common Mistakes
Do not overmix batter after adding flour to avoid developing gluten-free flour blends, which creates dense crumb
Do not skip the greasing step or use ungreased moulds to prevent sticking and frustration removing doughnuts
Do not add all milk at once to avoid over-wet batter that won't hold shape in moulds
Substitutions
Dairy-Free Swaps
Vegan Options
may slightly increase density
Full guide →General Alternatives
FAQ
Can I make these doughnuts dairy-free?
Yes. Replace butter with coconut oil and milk with non-dairy alternatives like oat or almond milk in a one-to-one ratio. This removes all animal products while maintaining the same batter consistency and results.
How long do these gluten-free doughnuts keep?
Store in an airtight container at room temperature for up to 2 days. Glazed doughnuts have slightly shorter shelf life due to moisture. Do not freeze, as the texture becomes compromised upon thawing.
What if my doughnuts stick to the mould?
Ensure moulds are thoroughly greased before spooning batter. Allow doughnuts to cool for 2-3 minutes after baking before removing. If stuck, gently run a thin knife around edges to loosen before turning out.