Homemade Flaky Crescent Rolls with Laminated Dough
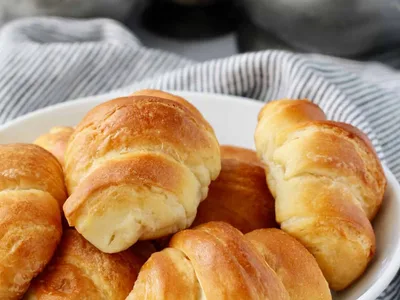
Buttery, tender crescent rolls made with a laminated dough technique that creates distinct flaky layers. The dough undergoes multiple folds and chilling cycles to develop the signature texture. Sweet, rich, and slightly salty, these rolls are ideal for breakfast, brunch, or alongside dinner. This version uses a stand mixer for ease and allows for advance preparation, making it practical for entertaining. The extended cold periods develop flavor and allow flexibility in your schedule.
Ingredients
- ½ cup lukewarm water
- 2 ¼ teaspoons instant or active dry yeastinstant yeast without 5-minute rest0.75 teaspoonconvenienceFull guide →
- 2 teaspoons sugar
- ¾ cup milk, warm (about 105 degrees F)
- 1 large eggmilk or plant-based milk for non-egg option1 tablespoon per eggveganadds dairy
removes:eggs
Full guide → - 1 tablespoon butter, softened, dough
- 1 teaspoon saltunsalted butter, then add 0.25 teaspoon salt to dough1:1dairy-free requires vegan butter alternativeFull guide →
- 3 ¼ cups unbleached all purpose flour
- 8 tablespoons salted butter, softened, for laminating
- ½ egg, whisked with 1 tablespoon water, egg wash
Instructions
- 1
Combine water, yeast, and sugar in stand mixer bowl. If using active dry yeast, let sit 5 minutes.
- 2
Add milk, egg, 1 tablespoon butter, and salt. Mix until combined.
- 3
Add flour and stir with dough hook until shaggy. Switch to medium-high speed and knead until smooth and elastic, about 5 to 7 minutes, adding flour by the tablespoon if needed. Dough should be fairly sticky.
- 4
Cover with plastic wrap and refrigerate 30 minutes.
- 5
Roll dough into a large rectangle between 1/4 and 1/2 inch thick.
- 6
Spread softened butter over dough, leaving 1 inch border around edges.
- 7
Fold shorter sides like an envelope to create three layers. Cover and freeze 7 to 10 minutes.
- 8
Roll and fold dough again. Cover and freeze 5 to 7 minutes. Repeat two more times for total of four folds.
- 9
After final fold, freeze 5 minutes before shaping, or wrap tightly in plastic and refrigerate overnight up to three days.
- 10
Roll dough to just over 1/4 inch thick. Cut in half lengthwise, then cut each half into 10 triangles.
- 11
Line two baking sheets with parchment paper.
- 12
Stretch each triangle lengthwise and roll from wider end toward point. Place on baking sheet and cover with oiled plastic wrap. Repeat with remaining dough.
- 13
Heat oven to 400 degrees F. Proof rolls 30 to 60 minutes until puffy.
- 14
Brush rolls with egg wash. Bake one sheet at a time, about 15 minutes, until golden.
Tips
Keep all surfaces cool when working with laminated dough. Chill your work surface and rolling pin before starting to prevent butter from melting into the dough rather than creating distinct layers.
If the dough tears during rolling and butter peeks through, dust the tear lightly with flour and press gently to seal. Minor repairs don't affect the final product.
The overnight refrigeration develops flavor and allows dough to relax, making shaping easier. This also makes the recipe more convenient for advance preparation.
Good to Know
Store cooled rolls in an airtight container at room temperature up to 2 days. Refrigerate up to 5 days. Freeze baked rolls up to 3 months in freezer bags. Reheat thawed rolls at 350 degrees F for 5 to 8 minutes.
Prepare dough through final fold and refrigerate tightly wrapped up to 3 days before shaping. Shape rolls and freeze unbaked up to 1 month; add 15 to 20 minutes to proof time when baking from frozen. Baked rolls can be frozen up to 3 months.
Serve warm with butter, jam, honey, or cheese. Perfect for breakfast, brunch, or alongside dinner. Can be plated individually or stacked on a serving platter.
Common Mistakes
Warm water or milk above 110 degrees F kills yeast. Keep liquids between 100 and 110 degrees F.
Overmixing after adding flour develops gluten unevenly. Stop kneading once smooth and elastic.
Butter melting into dough rather than creating layers means temperature was too warm. Freeze dough between folds and use cool work surface.
Insufficient proofing results in dense rolls. Proof until noticeably puffy and dough springs back slowly when poked.
Overbaking creates tough, overly brown rolls. Bake until golden, not deep brown.
Substitutions
Dairy-Free Swaps
Vegan Options
removes:eggs
Full guide →General Alternatives
FAQ
Can I use instant yeast instead of active dry yeast?
Yes. Instant yeast activates faster, so skip the 5-minute rest step if using instant. Use the same quantity. Both work well in laminated doughs.
What if my dough is too sticky to shape?
This is normal. Chill the dough for 15 to 20 minutes before rolling and shaping. Cold dough is easier to work with. Lightly flour your work surface and hands, but avoid adding excess flour to the dough itself.
How long can I keep shaped, unbaked rolls in the freezer?
Freeze shaped rolls up to 1 month in airtight freezer bags. Bake directly from frozen, adding 15 to 20 minutes to the proof time. No thawing needed.