Gluten-Free Royal Blue Velvet Layer Cake
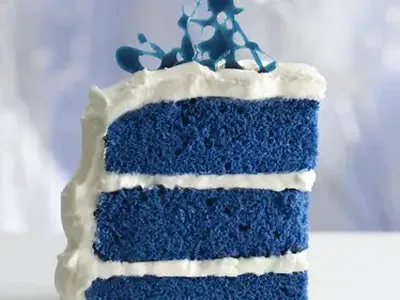
A striking twist on classic red velvet cake, this vibrant blue version features moist white cake enhanced with cocoa and royal blue food coloring. The dramatic deep blue layers are complemented by fluffy marshmallow buttercream frosting that's lighter and sweeter than traditional cream cheese frosting. Perfect for special celebrations, birthdays, or any occasion that calls for a show-stopping dessert. The combination of royal blue and violet food coloring creates a rich, jewel-toned cake that's as delicious as it is visually impressive.
Ingredients
- 1 box Betty Crocker Super Moist White Cake Mix
- 1 cup buttermilk
- ½ cup vegetable oil
- 3 eggs
- 1 tablespoon unsweetened baking cocoa
- 2 teaspoons royal blue paste food color
- 1 toothpickful violet paste food color
- 1 jar (7 oz) marshmallow cremecream cheese frostingstandard cream cheese frosting recipeflavoradds dairy
more traditional red velvet taste
- 1 cup butter, softened
- 2 ½ cups powdered sugar
- ⅛ teaspoon salt
Instructions
- 1
Heat oven to 350°F (325°F for dark or nonstick pans) and spray three 8-inch round cake pans with cooking spray, then line with parchment paper
- 2
Beat cake ingredients with electric mixer on medium speed for 2 minutes, scraping bowl occasionally
- 3
Divide batter evenly among prepared pans
- 4
Bake 18 to 22 minutes or until toothpick inserted in center comes out clean
- 5
Cool in pans for 10 minutes, then remove to cooling rack and remove parchment paper
- 6
Cool completely, about 45 minutes
- 7
Beat marshmallow creme and softened butter with electric mixer on medium speed until smooth, scraping bowl occasionally
- 8
Beat in powdered sugar and salt on low speed until smooth
- 9
Trim rounded tops of 2 cake layers to flatten if necessary
- 10
Place first layer top side down on serving plate and spread with about 1/3 cup frosting
- 11
Add second layer top side down and spread with about 1/3 cup frosting
- 12
Top with untrimmed layer top side up
- 13
Frost sides and top of cake with remaining frosting
Tips
Use paste food coloring rather than liquid for more vibrant color without thinning the batter
Allow cake layers to cool completely before frosting to prevent the marshmallow buttercream from melting
Store the finished cake covered in the refrigerator to keep the marshmallow frosting stable
Good to Know
Store loosely covered in refrigerator
Cake layers can be baked ahead and wrapped, frosted cake best served within 3 days
Serve at room temperature or slightly chilled
Common Mistakes
Cool layers completely to avoid melting the marshmallow frosting
Don't overmix the frosting to maintain smooth texture
Substitutions
more traditional red velvet taste
FAQ
Can I make this cake without food coloring?
Yes, omit the food coloring for a vanilla-cocoa cake, though it won't have the signature blue color that makes this recipe special.
How long does this cake keep?
Store covered in refrigerator for up to 5 days. The marshmallow frosting stays stable when properly stored and chilled.
Can I freeze the cake layers?
Yes, wrap cooled unfrosted layers tightly and freeze up to 3 months. Thaw completely before frosting and assembling.