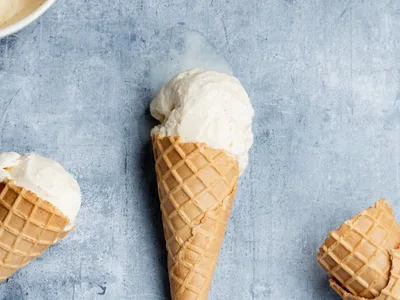
Homemade Vanilla Ice Cream Without Machine
Rich, creamy vanilla ice cream made entirely by hand without an ice cream maker. This method uses a cooked custard base—egg yolks and sugar beaten until pale, combined with infused cream and milk heated with real vanilla bean—then frozen with periodic stirring. The result is silky and deeply flavored, with an elegant vanilla character from real bean. Special about this recipe is the careful tempering technique: adding hot cream gradually to eggs prevents scrambling while building a proper custard. The texture becomes luxuriously smooth through frequent stirring during freezing, breaking up ice crystals. Ideal for home cooks seeking restaurant-quality ice cream without equipment investment. Serve after dinner or at summer gatherings. This version stands apart through its vanilla bean infusion rather than extract, delivering superior flavor and visible vanilla specks.
Ingredients
- 2 ½ cups whole milk
- 1 ½ cups heavy cream
- 1 large vanilla bean, split in half
- 6 egg yolks2 tablespoons cornstarch mixed with 2 tablespoons water1:1veganegg-freeeggs-free
texture slightly less rich, removes:eggs
Full guide → - ⅓ cups sugar
Instructions
- 1
Beat egg yolks and sugar together until the mixture turns pale and whitens
- 2
Heat milk and cream with the split vanilla bean until it reaches a boil, then turn off heat immediately
- 3
Let the vanilla mixture cool slightly, then remove the bean
- 4
Pour the hot cream mixture into the beaten eggs in 5-6 separate batches, stirring constantly between additions to temper the eggs
- 5
Return the entire mixture to the pan over low heat, stirring with a spatula until it thickens enough to coat the back of a spoon
- 6
Cool the custard completely, then transfer to a freezer-safe container and refrigerate for 1 hour
- 7
Move to the freezer and stir vigorously every hour until completely frozen, about 6 hours total
Tips
Temper eggs slowly by adding hot cream in small batches while stirring—this prevents scrambling and ensures a silky custard base that freezes smoothly without graininess.
Stir every hour during freezing without fail; this breaks ice crystals repeatedly and creates the creamy texture an ice cream maker would provide, crucial for no-machine success.
Split the vanilla bean lengthwise and scrape seeds into the cream before heating—both pod and seeds infuse deeply, delivering authentic vanilla flavor superior to extract.
Good to Know
Cover with cling film and freeze up to 2 weeks. Thaw in fridge 10-15 minutes before serving for scoopability.
Prepare custard base up to 2 days ahead; refrigerate covered. Freeze and stir as directed just before serving.
Serve after dinner, at summer gatherings, or alongside warm desserts like pie or cake.
Common Mistakes
Add hot cream too quickly to eggs to avoid scrambling and curdling the custard irreversibly.
Skip hourly stirring to avoid large ice crystals forming, resulting in hard, grainy texture.
Omit the cooling step to avoid ice crystals seizing the mixture too rapidly in the freezer.
Substitutions
Vegan Options
texture slightly less rich, removes:eggs
Full guide →General Alternatives
FAQ
Can I use vanilla extract instead of a vanilla bean?
Yes, substitute 1 teaspoon vanilla extract added after cooking. Extract provides convenience and works well, though real vanilla bean delivers superior aroma and visible specks. If using extract, add it when the custard cools to preserve fragile flavor compounds.
What if I forget to stir every hour?
Stir as soon as you remember. Missing one or two stirrings creates larger ice crystals and slightly grainy texture, but the result remains edible. Consistent stirring is what distinguishes this no-machine method from simply freezing cream—it mimics churning's purpose.
How long does homemade ice cream keep in the freezer?
Properly stored under cling film, it keeps up to 2 weeks. Beyond this, freezer burn and flavor degradation occur. Always use an airtight container or wrap well, as ice cream absorbs odors from the freezer quickly.